Thursday, March 7, 2013

Historical Eye Candy

I went to the library today.  You know, the building where they have books. :-)

Anyway, I was looking through the shelves to see what caught my eye.  Sadly there are ZERO books about dollhouses or miniatures, but that doesn't mean you can't find something great to look at.

I found an amazing book called "Houses of the Founding Fathers" by Hugh Howard.  It is available on Amazon and you can find it here.

 
The pic is a large book of mostly pictures and interesting information.  The reason I fell in love with it, and will probably be purchasing a copy one day, is all the eye candy.  If you have ever thought about doing a dollhouse or miniature room based on a home from the 1700's, this is the book for you.
 
Just look at all this inspiration.  I hope it is OK to show these few pictures.  I'm showing much less than they show on Amazon. :-)  I'm sorry if the pictures aren't their best, but it is a glossy print book and I was just using my iPhone.


The book is full of information about each of the owners of the different houses and what life was like during that time period.
 
Here is a list of information that I thought was really interesting about the late 1700s in the United States.
 
*  The average child had about a 50% chance of surviving to adulthood.
*  All cooking was done in or around a fireplace/open fire.
*  There was no anesthesia for surgery or childbirth.
*  Other than sunlight, the only source of heat was from fire.
*  Slavery was legal in all thirteen colonies.
*  Every household produced most, if not all, of the candles, soap, foodstuffs and clothing it needed.
 
I hope you found this information as interesting as I did and I hope you check out this book.


Till later!

Wednesday, February 20, 2013

Wanna make some books??

I have so much catching up to do.  I have been doing some blog reading but haven't really done much commenting but hopefully that is going to change starting today.  It is time to move forward and being here with friends makes me feel happy. :-)

I promised y'all a tutorial on making miniature books for your settings and I am keeping my promise.  Diving into my miniatures has been comforting to me.

If you want to see how I make my miniature books, here is the video from YouTube.


There are other ways to make them than what I have shown, but I find this to be one of the simplest methods.  I have been asked about readable books as well as static, open books so perhaps in the future I will supplement this video with another on those two things.

I mentioned in the video that the hardest part of this project is actually making the book covers.  I use a program called Paint Shop Pro and combine photos of books found on the Internet, alter and move things around on the photo and scale it all down to work with 1:12 scale.  When doing this, remember that the higher the resolution, the better your book cover will look when you print it out.  Maybe I need to make some kits.  Hmmmmm.

Don't have a photo editing program? Well that isn't a problem either. Find some decorative paper or scrapbook paper that has a leather look or design that you like and just cut out some book covers from that.  You can use a fine-point gold pen to add some details to the spine of the book.  The rest of the project can be done just like in the video. 

Don't want to use paper, well if you have some thin leather you can have some really nice, leather bound books on your dollhouse shelves. Just glue the leather to the card stock just like you would the printed book cover.

I'm sure there will be some questions and I hope you don't hesitate to ask.  If you aren't comfortable asking in public, please shoot me an email and I'll do my best to help you out.

These are the pics from the end of the video so you can take a closer look if you like.


Till later!

Friday, February 15, 2013

Thank you everyone!

This past week has been emotionally and physically draining as I'm sure many of you are aware.

I wanted to send a quick thank you to everyone for the beautiful emails and comments I received.  During this hard time it is so comforting to know people are understanding and care.  The miniature community continues to amaze me with the love and kindness its members share and have always shared.  In all the hobbies in the world, I have never seen one as closeknit and caring as the miniature family.

Now the healing begins.  Right now I'm focused on helping my partner, his mother and his family as they try and get back to as normal a life as they can in this traumatic time.  As for me, I turned to my miniatures as part of my healing process and I will be back soon to share with you all. 

Once again thank you!!

HUGS

Dale

Sunday, February 10, 2013

And the heavens cried

Normally I try and keep my blog about miniatures but sometimes things happen and you just feel better talking about them.

Today at about 2pm my partners father died suddenly of what we believe to be a heart attack.  This man was only 61 years old and has been like a second father to me for the last 14 years. 

Tonight it is raining and I believe the heavens are crying with joy to receive such a great and kind man and we are crying down here because we lost one.

I love you PawPaw.

Saturday, February 9, 2013

Packing up...and unpacking

As you may know, I'm slowly packing up our current home and moving into our new home.  This includes my WRECK of an office.  It has been one of those weeks.  We have a saying..."Sometimes you are the windshield and sometimes you are the bug.".  Well this week I have been all bug.  Nothing is getting done as I would like and I have not been able to get my video made for the book tutorial.

However in all the chaos of the week, I did happen upon a couple boxes in my office closet that I had not touched in almost two years.  I love things like that.  It is like finding treasure.  In this box were some cherished minis as well as some items for projects I have been wanting to do.  You know what that means....more pics and more video inspiration.  :-)  WOOHOO!!!

First a few dolls I did back when I was still doing them.  I have to admit that I miss working on these little people.

This is Ruby.  She is the first doll I ever did and I named her after my mother.  A dear friend sent a kit to me right after I started doing miniatures and told me to "See what you can do with this".  This is what I created.  I love her and she will always have a special place in my world.


This is Elrac and he was my first male doll.  I never wanted to do the same Victorian dolls that everyone else was doing.  This genie was made and for years sat on my computer monitor to keep my company.  He is named after a dear friend that I lost named Carl.  (Elrac is Carl backward).  The fabric for his genie costume was made from fabric I used to make Carl his last Halloween costume.  I later did an another genie doll and he was exhibited in the St. Louis Miniature Museum before being sold to a private collector.


This is Miss. Scarlet.  At one point in my miniature life I had wanted to make an entire cast of characters from the game CLUE.  I have never been happy with her look and more than likely she will be completely stripped down to parts and redone into something much more suiting my character.  I always thought she looked more matronly than she should.


This is my attempt at making a Dolly Parton doll for my partner.  He is a HUGE fan of Dolly and I promised I would make him a doll.  Well that was about 10 years ago and you can see she still isn't done.  She has been sitting in that poor 80s style outfit for too long.  No nails, bad hair and a dusty guitar is not what she deserves. She will also get stripped down and redone into something MUCH more appropriate. 


This next picture shows an Egyptian display I started a long time ago and it gives a good example of BAD paper clay use. I was so discouraged with the outcome that it was packed away and never completed.  Perhaps now I know more things and can turn it into a winner instead of a sad thing.  Elrac was never meant to sit in this room, he just seemed happy to be in that picture. :-)  The display measures 8 inches square and it is 7 inches from the floor to the top of the wall.  Another bad bit of planning on my part.  Short ceiling.  ARGH!


I am also a huge fan of boxes.  I don't care what kind of boxes they are, I just like boxes.  I don't know why and I could never explain to you a reason.  Cigar boxes, wine boxes, decorative boxes...all of them are loved by me and I have a few great ones.  Here are two that I hope to make miniature scenes in one day.
 
First up is a large wine box.  It measures 10inches wide, 7.5 inches deep and 13 inches tall.  It is a great size for a display.  I always thought it would make a great wine cellar with lots of bottles and barrels in it.  Perhaps a set of stairs that disappear and give an illusion of more around the corner.  I'm going to have to really do something with that.  The lid actually is attached and swings open.
 

I put Ruby and a Bespaq Secretary in there to give you an idea of the size of the interior.  Lots of room if I get really creative in the space layout.

 
The last box I'm showing you is really going to take some creative thinking to come up with an idea to put in it.  It is a small wooden box with an opening on the lid.  It held a very nice bottle of rum at one time (rum long gone, box still here).  The interior dimensions are 7.25 inches wide, 5 inches deep and 9 inches tall.  I have one idea for it already and that is to make the interior a very arabesque feel and put Elrac in there as a permanent display.  Still pondering.  The details on the outside are in brass and are wonderful.  Should make a fun display piece one day.


That is all for now.  Hope you get a kick out of some of my old stuff and some of my unfinished projects.  There are lots more including an art deco room with a secret door and a Metaphysical witch shop that is still in the works.  Oh and of course the Lisa's Country Cottage that I did in the videos.  Guess I have enough to keep me busy for a while. 

Did I mention I want to also do a complete, vintage-inspired tiki bar like Trader Vic's?  HA HA Need to teach myself how to make mini bamboo.  :-)


Till later!

Tuesday, February 5, 2013

Time to turn a page....or not?

Hello everyone.

No video to share yet, but I thought I would slip in a picture of what is coming next.  A quick and simple project that will add a touch of class to any miniature room and give it that lived in look.


Yep, next we are going to tackle books.

On another note, AM over at SouthHampton Grey (check him out http://southhamptongrey.blogspot.com/) was intrigued when I mentioned I had pink counters in my kitchen.  I am not sure if I would have picked pink, but they are original to the house and we really felt they fit the place so they stayed.  Plus, I'm not really afraid of color.   These are the countertops I am always doing my videos on.  So don't think you need to adjust the color on your monitors when you watch my videos cause the background really is pink.  :-)  And yep, that is the infamous Cuckoo clock you always hear ticking in the background. HAHA

The range hood and the incandescent bulbs really change the color above the stove, but you can see the true color on the section in front of the window.

We painted the dining room walls a very close shade to the countertops (just a bit darker).
 

Now, back to miniatures.  I need some suggestions from my friends on what you might like to see me do a video on.  I have lots of ideas, but it is always nice to get some hints about what is on people's minds. 


Till later!

Friday, February 1, 2013

Hanging Dollhouse Plant....and inner reflections

Yesterday I was finally able to spend about an hour or two and get a new video tutorial made.

I hope you enjoy it and please let me know if you have any questions.


I have learned some important things while making videos and I think the first thing is this...keep what you are working on in the cameras view.  I am the first one to fuss at the computer if I'm watching a tutorial and suddenly the person in the video is working on something and you can't see it because they are out of focus or out of view.  Well now I can yell at myself. HA HA! I notice in this latest video that there are quite a few times that I am out of focus and you can't see what I'm doing. I'm hoping that when I finally get my craft room/office complete in the new home I will be able to set up an appropriate video/picture location and not have to stand at my kitchen counter and film. 

I have also learned that cell phones are great, however they are not so wonderful when you forget to turn them off and they start ringing in the middle of taping.  CUT!  TAKE TWO!  On my phone if someone starts a group message it can really sound like a cartoon with all the different noises, bells and whistles that emit from it.  Great when you are texting, not great when you are trying to film something.

Something else I have noticed is that I can be easily distracted, even while actually talking and shooting video.  I think the lack of radio in the background is part of the problem.  I turn the music off when I'm filming so as to not have to worry about copyrights and such on YouTube, but I notice that if I'm in a quiet room my brain will really start running around.  It can actually be funny and one day I should do a video of just bloopers.  I can be talking about gluing a piece of wood and suddenly my mouth turns to mush...SQUIRREL....and I can't talk at all...SHINY.  See, happens even when I'm typing.  While my short attention span is bad for filming, I still think it is one of the traits that a lot of us miniaturists share and probably one of the things that makes us able to do this great hobby/craft/job.  How else could we possibly do everything we need to do and pull together such works of art?

Enough babble out of me.  Here are a few pics of the finished hanging Pothos plant and I'm sure I'll be seeing you again really soon.


Till later!

Monday, January 28, 2013

Something is growing on the Potting Bench

With some real life stuff happening, my muse seemed to leave and I was at a loss of what to show you folks. 

Well I don't have a lot to share, but I thought I would give you a sneak peak at what the next tutorial is going to be. 

It seems I'm still in a bit of a Spring mode and thought that a nice houseplant would be a fun project. 

I started work today on a Pothos plant.  The leaves are from an old Jeannetta Kendall kit I had for years and finally pulled out of the drawer to do something with.  The laser cut leaves are perfect and all you do is paint, shape and glue to whatever you choose to use for the vines. 

I will get into more details in the video and future blog post, but until then I thought I would share with you the one small vine I was able to do today between everything else happening. :-)


Till later!

Wednesday, January 23, 2013

Slap some paint on that Potting Bench and call it done!

If you followed along in the last video you should have a finished Potting Bench all ready for some color and fun.

Heck, even if you didn't follow along, you can look at this latest video and see how to paint something and apply a quick and easy crackle finish without the expense of the "more costly" brand-name crackle mediums.

Here is the video on YouTube that shows how I applied three different layers of paint to the potting bench I made.


After watching the video, I think some of you may have been surprised that you could use regular ol' Elmer's School Glue as a crackle medium.  I was shocked the first time I found out and wish I had known sooner before spending a small fortune on a project buying the small bottles of the name brand crackle medium.
 
Here are some tips to help out should you decide to do this project.
 
Don't buy the fancy stuff, get the $1 bottle from the discount store.
 
*  When applying the glue, following the grain will give you cracks that run the grain of the wood
 
*  If you want small cracks and more of a crazing, apply the glue with a small brush in an "X" pattern.
 
*  DO NOT let your glue dry completely before putting on your top layer of paint. If you do, it will not crack.  The glue must still be sticky when you put on that next layer of paint.
 
*  The cracking shows up best if you use contrasting paint colors for base coat and top coat, but you can do some really pretty effects with tone-on-tone colors, especially if you do some antiquing like I did.
 
* Work on small sections at a time.  The total crackle process on this bench took me about 2 hours.
 
* Make sure that you let the top coat of paint dry for at least a few hours.  Even when you think it is dry, leave it alone.  The cracks will continue to happen as long as the glue under the paint is drying. I prefer letting it sit overnight befor doing anything else to it.
 
 
I hope you enjoyed this video and I hope you try this finish on something.  You can do some incredible effects.  Looking for something with an Asian flair? Perhaps a bit of Gold base coat under a black or red top coat.  Just saying.


Thanks again for following along with me on this journey and like I always say...
 
Till later!

Sunday, January 20, 2013

Dreaming of Spring - Dollhouse Potting Bench Tutorial

I'm really getting into the excitement of making videos for YouTube, but after completing construction of Lisa's Country Cottage I was at a loss of what to film next.  Oh the life of an artist, always chasing my Muse.  HA HA!

Anyway, I was sitting here watching the weather and seeing the cold temps in the future and I needed a bit of Spring in my life.  I decided I would build another potting bench and show others how it can be done cheaply and easily.  This is a pic of the finished product just to tease you.  This tutorial will be to just build the potting shed (or produce stand as in this picture), not the other items.  Maybe they will be other tutorials.


The Finished Project
Here is the video for the first part of the bench, the construction phase.  In the next video I will show how I painted and aged the bench to give it a much more used look.


Now if you tried to follow along and I totally confused you, here is some additional information that you might find helpful.

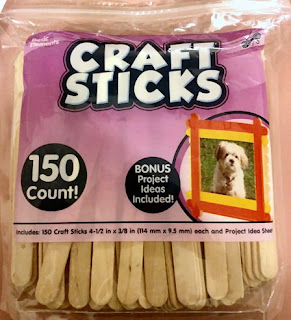
First you will need to get a couple strips of 1/4" square basswood or Balsa wood.  You will also need a pack of Craft Sticks and a pack of Skinny Sticks.

Craft Sticks are 4.5"x3/8" (114mm x 9.5mm) each
 
Skinny Sticks are 5.75"x1/4" (146mm x 6mm) each

In this still shot from the video you see the pieces after I have cut them out of the 1/4" square strip of wood. 


Here is a list of each size you will need and how many:


3"  -  2 (front legs)
4.75"  -  2 (back legs)
4"  -  5 (horizontal supports)
2"  -  6 (vertical supports)
1/2"  -  3 (upper shelf supports)

The video will show you how to put all of those together and then add the back details and the skinny sticks to make your bench top, upper shelf and lower shelf.  If you follow the instructions, at the end you should have something that looks like this.


In the next video I will show you how to do the paint finish on the bench.  For this one, to achieve the look in the first picture, it required 3 different layers of paint and utilized 2 different techniques.  Should be lots of fun and once you get the basic construction figured out, you can adjust the details however you want to make it your own.
 
Till later!

Friday, January 18, 2013

I'm Raising the Roof...Video 4 is now up on YouTube

Hi Everyone.

The fourth video, and final in this series, is now up and running on YouTube. 

Thanks again for following along and hopefully someone will learn something from these.

I have already recorded another video and it is now in production. :-)  Don't that sound official? HAHA


Till later!

Tuesday, January 15, 2013

Just Released...Part 3 of the Lisa's Cottage Build

Hello everyone.

After two days of fighting with YouTube and my internet connection, I was able to get the latest installment of my Shell Kit Construction series uploaded and ready for viewing.

I have also decided what I'm making out of it.  It is going to be a Christmas store...with a twist.  You all know I can't do anything normal.  I'm not going to share any more than that.  If you want to see what happens with this store you are just going to have to keep tuning in.  :-)

Thanks for following along.


Till later!

Sunday, January 13, 2013

Part 2 Now on YouTube

Hello again everyone.

First, I wanted to thank you all for watching my first video.  I have had such kind emails and comments, both online and privately.  It makes a guy feel good to hear that kind of thing.

I have FINALLY completed Part 2 in the series after many failed upload attempts and other laptop/connection issues.

I'm happy to share Part 2 with you.


Till later!

Thursday, January 10, 2013

My first YouTube Video is finally here!

I am so excited to be able to share this with all of you.

I have often looked at videos on YouTube about dollhouses and miniatures and thought it would be fun to do something similar. I finally had a little down time from working on the real-size house and decided to go ahead and jump into YouTube with both feet.

I would love it if you could take a look and let me know what you think. I know I'm nervous and the picture isn't the best but hopefully it isn't too bad for a beginner.


I have already recorded enough video to make a few more so don't feel like this will be my only one. I just have to do some editing and make them pretty. It would be great if you could subscribe.

If you have any suggestions or comments, you can leave them here or on the video.

Thanks again for following me on this journey.

Till later!

Wednesday, January 9, 2013

Coming Soon!!

I hope in the next couple days to start a series of videos on YouTube about constructing a dollhouse shell kit. 

It will start with the very basics and work up from there. 

Very exciting news for me because I have never done anything like this before.

Should be fun! 

Once I get the first video up I'll be sure to come back and share the link with everyone.

Thanks!

Till later!