Friday, February 1, 2013

Hanging Dollhouse Plant....and inner reflections

Yesterday I was finally able to spend about an hour or two and get a new video tutorial made.

I hope you enjoy it and please let me know if you have any questions.


I have learned some important things while making videos and I think the first thing is this...keep what you are working on in the cameras view.  I am the first one to fuss at the computer if I'm watching a tutorial and suddenly the person in the video is working on something and you can't see it because they are out of focus or out of view.  Well now I can yell at myself. HA HA! I notice in this latest video that there are quite a few times that I am out of focus and you can't see what I'm doing. I'm hoping that when I finally get my craft room/office complete in the new home I will be able to set up an appropriate video/picture location and not have to stand at my kitchen counter and film. 

I have also learned that cell phones are great, however they are not so wonderful when you forget to turn them off and they start ringing in the middle of taping.  CUT!  TAKE TWO!  On my phone if someone starts a group message it can really sound like a cartoon with all the different noises, bells and whistles that emit from it.  Great when you are texting, not great when you are trying to film something.

Something else I have noticed is that I can be easily distracted, even while actually talking and shooting video.  I think the lack of radio in the background is part of the problem.  I turn the music off when I'm filming so as to not have to worry about copyrights and such on YouTube, but I notice that if I'm in a quiet room my brain will really start running around.  It can actually be funny and one day I should do a video of just bloopers.  I can be talking about gluing a piece of wood and suddenly my mouth turns to mush...SQUIRREL....and I can't talk at all...SHINY.  See, happens even when I'm typing.  While my short attention span is bad for filming, I still think it is one of the traits that a lot of us miniaturists share and probably one of the things that makes us able to do this great hobby/craft/job.  How else could we possibly do everything we need to do and pull together such works of art?

Enough babble out of me.  Here are a few pics of the finished hanging Pothos plant and I'm sure I'll be seeing you again really soon.


Till later!

Monday, January 28, 2013

Something is growing on the Potting Bench

With some real life stuff happening, my muse seemed to leave and I was at a loss of what to show you folks. 

Well I don't have a lot to share, but I thought I would give you a sneak peak at what the next tutorial is going to be. 

It seems I'm still in a bit of a Spring mode and thought that a nice houseplant would be a fun project. 

I started work today on a Pothos plant.  The leaves are from an old Jeannetta Kendall kit I had for years and finally pulled out of the drawer to do something with.  The laser cut leaves are perfect and all you do is paint, shape and glue to whatever you choose to use for the vines. 

I will get into more details in the video and future blog post, but until then I thought I would share with you the one small vine I was able to do today between everything else happening. :-)


Till later!

Wednesday, January 23, 2013

Slap some paint on that Potting Bench and call it done!

If you followed along in the last video you should have a finished Potting Bench all ready for some color and fun.

Heck, even if you didn't follow along, you can look at this latest video and see how to paint something and apply a quick and easy crackle finish without the expense of the "more costly" brand-name crackle mediums.

Here is the video on YouTube that shows how I applied three different layers of paint to the potting bench I made.


After watching the video, I think some of you may have been surprised that you could use regular ol' Elmer's School Glue as a crackle medium.  I was shocked the first time I found out and wish I had known sooner before spending a small fortune on a project buying the small bottles of the name brand crackle medium.
 
Here are some tips to help out should you decide to do this project.
 
*  Don't buy the fancy stuff, get the $1 bottle from the discount store.
 
*  When applying the glue, following the grain will give you cracks that run the grain of the wood
 
*  If you want small cracks and more of a crazing, apply the glue with a small brush in an "X" pattern.
 
*  DO NOT let your glue dry completely before putting on your top layer of paint. If you do, it will not crack.  The glue must still be sticky when you put on that next layer of paint.
 
*  The cracking shows up best if you use contrasting paint colors for base coat and top coat, but you can do some really pretty effects with tone-on-tone colors, especially if you do some antiquing like I did.
 
* Work on small sections at a time.  The total crackle process on this bench took me about 2 hours.
 
* Make sure that you let the top coat of paint dry for at least a few hours.  Even when you think it is dry, leave it alone.  The cracks will continue to happen as long as the glue under the paint is drying. I prefer letting it sit overnight befor doing anything else to it.
 
 
I hope you enjoyed this video and I hope you try this finish on something.  You can do some incredible effects.  Looking for something with an Asian flair? Perhaps a bit of Gold base coat under a black or red top coat.  Just saying.


Thanks again for following along with me on this journey and like I always say...
 
Till later!

Sunday, January 20, 2013

Dreaming of Spring - Dollhouse Potting Bench Tutorial

I'm really getting into the excitement of making videos for YouTube, but after completing construction of Lisa's Country Cottage I was at a loss of what to film next.  Oh the life of an artist, always chasing my Muse.  HA HA!

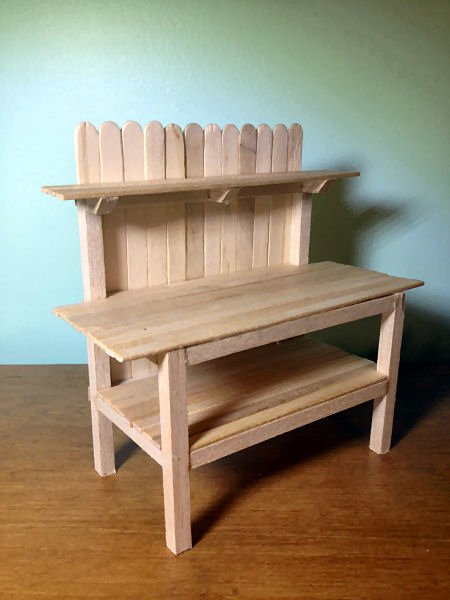
Anyway, I was sitting here watching the weather and seeing the cold temps in the future and I needed a bit of Spring in my life.  I decided I would build another potting bench and show others how it can be done cheaply and easily.  This is a pic of the finished product just to tease you.  This tutorial will be to just build the potting shed (or produce stand as in this picture), not the other items.  Maybe they will be other tutorials.


The Finished Project
Here is the video for the first part of the bench, the construction phase.  In the next video I will show how I painted and aged the bench to give it a much more used look.


Now if you tried to follow along and I totally confused you, here is some additional information that you might find helpful.

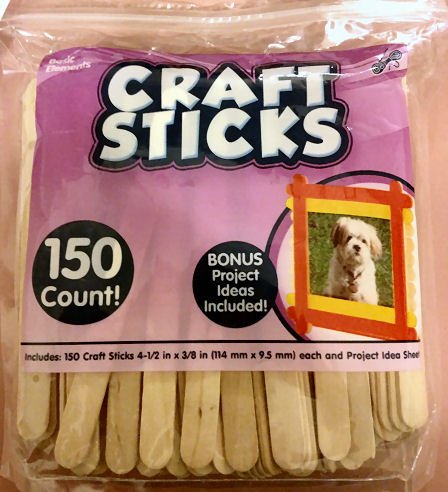
First you will need to get a couple strips of 1/4" square basswood or Balsa wood.  You will also need a pack of Craft Sticks and a pack of Skinny Sticks.

Craft Sticks are 4.5"x3/8" (114mm x 9.5mm) each
 
Skinny Sticks are 5.75"x1/4" (146mm x 6mm) each

In this still shot from the video you see the pieces after I have cut them out of the 1/4" square strip of wood. 


Here is a list of each size you will need and how many:


3"  -  2 (front legs)
4.75"  -  2 (back legs)
4"  -  5 (horizontal supports)
2"  -  6 (vertical supports)
1/2"  -  3 (upper shelf supports)

The video will show you how to put all of those together and then add the back details and the skinny sticks to make your bench top, upper shelf and lower shelf.  If you follow the instructions, at the end you should have something that looks like this.


In the next video I will show you how to do the paint finish on the bench.  For this one, to achieve the look in the first picture, it required 3 different layers of paint and utilized 2 different techniques.  Should be lots of fun and once you get the basic construction figured out, you can adjust the details however you want to make it your own.
 
Till later!

Friday, January 18, 2013

I'm Raising the Roof...Video 4 is now up on YouTube

Hi Everyone.

The fourth video, and final in this series, is now up and running on YouTube. 

Thanks again for following along and hopefully someone will learn something from these.

I have already recorded another video and it is now in production. :-)  Don't that sound official? HAHA


Till later!

Tuesday, January 15, 2013

Just Released...Part 3 of the Lisa's Cottage Build

Hello everyone.

After two days of fighting with YouTube and my internet connection, I was able to get the latest installment of my Shell Kit Construction series uploaded and ready for viewing.

I have also decided what I'm making out of it.  It is going to be a Christmas store...with a twist.  You all know I can't do anything normal.  I'm not going to share any more than that.  If you want to see what happens with this store you are just going to have to keep tuning in.  :-)

Thanks for following along.


Till later!

Sunday, January 13, 2013

Part 2 Now on YouTube

Hello again everyone.

First, I wanted to thank you all for watching my first video.  I have had such kind emails and comments, both online and privately.  It makes a guy feel good to hear that kind of thing.

I have FINALLY completed Part 2 in the series after many failed upload attempts and other laptop/connection issues.

I'm happy to share Part 2 with you.


Till later!