Showing posts with label Mystic Path. Show all posts

Tuesday, September 27, 2011

Mystic Path has products for Sale...and more!

This past weekend I was able to play around with my miniatures. 

A forum friend (Thanks Barb!!) told me how to use empty capsules and resin to make bottles/potions.  This was the first time I had worked with either so it was a definite trial and error process, but I'm happy with the results.  Not shown are a bunch of rejects (overfills and other oops).  I created the labels in Paint Shop Pro and shrunk them down when I printed them.  This is a series of bath oil blends.  I think I'm going to be busy with bottle making for a while. HAHA! 


I also took a few hours and quickly whipped together a distressed workbench that I'm now pondering on what to do with it.  Originally I had thought about putting together a Jack-O-Lantern in progress scene, but then I started playing around and made some sweet potatoes and regular potatoes.  Now I'm thinking a Autumn harvest scene.  Gosh, I don't know.  I really don't need another project, but is there ever a time when we mini lovers have just one project going at a time? I'm thinking not.

Anyway, here are some pictures of the workbench.  I haven't really done much furniture building before so I'm really pleased with the outcome!


Well that is all for now.  Remember if you want to see the pictures bigger, just click on them. 

Oh, and before I forget, the forum that I belong to is fairly new and everyone is so wonderful on there.  You'll find some AMAZING talent on there.  Hopefully the owner won't mind me posting this.  :-)  Hey Pam!! I'm asking forgiveness just in case.  LOL  Here is a link to it. http://meca1.com/forum/index.php

Till later!

Saturday, September 17, 2011

The Mystic Path...an update on the fortune tellers room

Well I had a day at home to play with minis.  Did some pictures, worked on some curtains, did some finalizing on some lights and this what I have to show you.

In the upper floor of The Mystic Path, Madam Aspen works telling fortunes, but she has the night off for Samhain.  Something isn't right though and with it being Halloween, the veil between the living and the dead is at its thinnest.  Looks like the cat is the only one around to see the goings on. 

The basic construction of this floor is complete.  Now all I have to do is work on accessories and finalizing it. 

I am really pondering something and I think I need y'all input on this.  I just can't decide on my own.  I'm considering putting a very faint face in the crystal ball.  I'm thinking it would be cool and not something that you would notice right away.  You would have to be looking right into the crystal ball to see it.  If you have ever ridden The Haunted Mansion at a Disney park, you have an idea of what I'm talking about.  It would be easy enough to accomplish.  Thoughts??  I'm also considering putting the cat on the chair looking up onto the table instead of on the floor.

OK...enough chatter.  Here are some pics for you.


Till later!

Sunday, September 11, 2011

So there is a use for cat hair

For years I have honestly wondered if there was a use for all the cat hair I seem to accumulate and pick up in my house.  With 4 cats (3 with hair), I was constantly brushing it off my clothes, gathering fur balls and sneezing.

For the Mystic Path room box I have been working on, the plan has always been for there to be a cat in the fortune tellers room watching the mysterious happenings going on.  You know how cats are, always wanting to put their noses in where they don't belong.

When I was in Chicago for the Bishop International Show, I picked up a small plastic cat that has the perfect pose.  He looked curious, but hesitant. One paw in the air as he pondered what to do next.  The problem was, he was a black and white cat and the colors just didn't seem to suit the room I was working on.  I bought some flocking and went to work.

Here is what he looked like before I got started.  Bad picture, but you get the idea.  As cute as this little fella was, he just wasn't right and needed a makeover.


First thing I did was paint him the way I wanted him.  I wanted an almost entirely black cat with just a small white diamond on his forehead.  So after a few minutes, I had a beautiful black painted plastic cat.  Now he needed some fur.  Even in dim light, you can tell if something is molded plastic or fuzzy.  My kitty had to have hair.

Out came the flocking.  Knowing that he was going to be black and white that is all I bought.  Lady Bug at the show told me that instead of using glue to attach the flock, it was better to use paint. WOW! I never would have thought of that and she was totally correct. Working in stages, starting at the tail, I slowly painted sections of the cat and applied the flocking using a small paint brush.  After a couple hours I had a new kitty and he sure seems happy with his new look.  On top of everything I have a small dusting of black flocking around my kitchen now.

Now sure what is worse to pick up....cat hair or flocking.

Oh, and the use for the cat hair?  Well take a close look and you'll see that our little friend has a new set of whiskers!  Yep, gathered a few hairs, cut them into pieces and applied them one at a time onto his little face with some glue.


Till later!

Saturday, September 10, 2011

Well Finally....the molding is complete!

When I started this project nine years ago, I never thought it would take me that long to finish the molding and get to the fun stuff.  My, how time sure passes us by!

This morning I finally pulled out the Mystic Path and started work. The first decision was what molding to use. On the first floor I had used a standard crown molding. For upstairs I wanted something a bit more subdued and chose to use a baseboard molding turned upside down. The actual baseboards are the same wooden feature I used on the first floor. I painted the baseboards the same color as the first floor and made the upper molding a shade darker to draw even less attention to them. The focus on the upstairs room isn't going to be the decor. I really want to make that a background tone supporting the true star of the show, the mysterious happenings going on in the fortune teller's room.


I wanted a way to separate the left area from the right up there so decided I would install hanging silk drapes. To support the curtain rod I constructed a basic bracket design from some purchased moldings and drilled a hole to hold the actual rod. The rod is not permanently in place so I can remove it to install the drapes and rehang it. On the rod I have strung a series of "antique" brass jump rings that will eventually hold the curtains.

You can get a better look at the bracket constructions and the entire rod contraption in this picture.


You can also see the two candles and the lamp I made taking up residence on the floor. Because they have been hard-wired, they can't be removed now and I was glad I remembered to leave the cords a bit long so they didn't hang when I removed the furniture to install the molding. Sometimes it can be hard to think backwards when putting these rooms together.

Now that the basic construction is done, I get to focus on the stuff that turns this from a basic room box to something extra special. I need to work on store items, make and install drapes, get some art on the walls, put down some area rugs...ARGH....better get off here and get to work!

Till later!

Monday, March 21, 2011

The Mystic Path....Part 4

Hello everyone.  Also a big hello to all the new followers. I'm honored to have you all here on my little journey.

Sorry for the delay in posting, but I haven't had time to do any minis lately, but I was able to pop out something I have been excited about for a long time.  Finally, I have a crystal ball for our Madam Aspen.  If you remember the story, she is away for the night and there are some magical happenings going on while she is gone.  I thought a glowing crystal ball on her table would be a perfect addition.

I have had a big marble I found for a long time but wasn't sure how I was going to light it up so it had an eerie glow.  Well, it suddenly fell into my head that I would have to make a stand from polymer clay and that is just what I did.  Sorry I don't have any "in the making" photos, but it was actually pretty easy.

I thought I would create a base that looked kinda woodsy and earthy.  I put some Sculpey into my clay gun and pushed out some spaghetti thin strands and started wrapping and forming them into a woodsy shape. The hard part was keeping it deep enough to hide the bulb but still small enough to look natural and not too large for the table it would be displayed on.  Once i was happy with the look, off it went to the oven for baking.  15 minutes later I had a nice stand ready for painting.

I applied a base coat of a soft brown and then brushed it with a bronze powder and antiqued with black.

The bulb was wired through a small hole I drilled in the base and through the top of the table.  Initially, the light was way too bright so I used some green Gallery Glass paint to tint the bulb and painted small spot on the bottom of the marble.  To me, green is just eerie.  Nobody looks good in green light except maybe the Wicked Witch of the West.  I can't leave it wired for now as I'll have to get the outside of the box finished first, but I couldn't wait to show everyone what it looks like.


Till later!


Wednesday, March 16, 2011

The Mystic Path....Part 3

First, thanks everyone that has started following me and thanks to Victoria for the very nice post about my blog on her own blog http://darksquirrelminiatures.blogspot.com/! Girl...you are awesome and so are your creations!! I have threatened to do a project with her and she hasn't run away so we'll have to see what happens in the future.

I'm sorry that there has been a lapse in my postings, but I had a friend in town and not everything can be miniatures. Sometimes real life steps in and in this case, it was a great visit!

I think we left off last time with the completion of the trim work on the shop space on the first floor and I promised to start telling you about the upstairs space, also known as the fortune teller's room.

When I think "fortune teller" my mind immediately goes to a dark room, plush with unusual lighting, creative furnishings and a general feeling of mystery.  That is the look and feel I wanted to create on the second floor of my roombox.  First thing I did was created an interior wall with a bumped out doorway. I wanted the viewer to feel they could exit the room and explore beyond the doors if they were allowed. 

Following the same procedures as the first floor, I created the walls with foam core and then attached the wallpaper to the mat board and attached that to the wooden walls.  In this picture, they are still loose and not attached because you shouldn't put up your finished walls until after you have completed your ceiling.  Always work from the top down....trust me, i have learned the hard way.


Now it was time to decide what I wanted to do to the ceiling.  I thought about papering the ceiling, but felt that it was just too boring for my eccentric lady of the house.  I was looking through some pictures and came across a photo of a bedroom with a pleated fabric ceiling.  THAT WAS IT!  After finding just the right colored Dupioni silk to match the wallpaper, I sat down and created a fabric ceiling for my lady, but I didn't want to do the entire ceiling. Call me silly, but that just seemed to be a bit busy for me.  Then I had another thought.  What if the room was divided into two separate areas.  In the larger area to the left would be the table with the crystal ball. I had already determined that and made allowances in the floor to even light the ball.  On the left I decided there needed to be an area where the clients could be greeted by Madam Aspen and led into the "inner sanctum".  not only would that allow me to break up the space, but it would also give it a bit more mystery. 

Now that it was decided only the left would be for fortunes, that is all I made a pleated ceiling for.  This is how that turned out.  First picture shows it before installation and the second shows you what it looks like in place.


Oh...you noticed the light huh?  Well, of course Madam couldn't have just a simple chandelier or ceiling fixture. I made a lamp and give it an old world (pseudo Moroccan) feel.  At least that is what I wanted it to look like.  The cylinder in the center is made from an aluminum mesh (the kind used for sculptures) and the top and bottom are buttons I found at a local store. I drilled a whole through the top button to run the light through.  The fun part was putting dot of glass paint in each of the tiny little diamonds on the mesh. Pictures really don't do justice to this fixture.  One day I will get a good picture showing the variety of color.


Now you say, you must have installed the crown molding and the baseboard.  Well, normally I would have, but I wanted some more custom lighting in the room. I just could not find any lights or electrified candles that I liked so I would have to make them.  Before I could attach the wallpaper I would have to finish my lighting and get it all installed. 

Next on my list of light projects was a table lamp with a cutout shade and some fun fringe. It just screamed eccentric to me and I'm LOVING it.


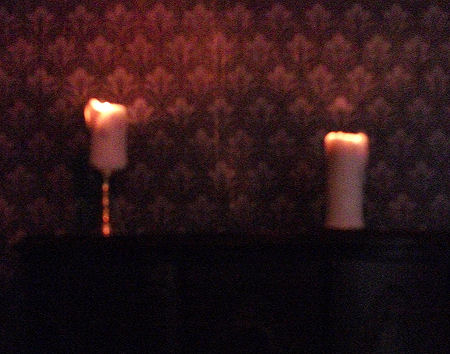
Now, what good is a fortune teller without some candles.  I looked online and in the stores and all the candles that were ready-made had these HUGE flame bulbs on them that just looked seriously out of place to me.  What can I say...I'm really picky.  I set out making some custom polymer clay candles and then electrified them with some tiny Micro bulbs that were only 1.5V.  Well guess what? Anyone? Anyone?  I'll tell you what.  When you plug a 1.5V bulb into a 12V transformer, they blow up and are then useless pieces of glass with some wires attached.  ARGH!! After a nice chat with the local mini store owner, I was taught about an amazing creation called a "resistor". WOOHOO! All I had to do was attach the resistor to one of the wires on the bulb (new ones of course) and then wire as normal.  Well I'll be damned...it worked.  Not being an electrician, I was more than pleased with my work.  The candles aren't much to look at with bright photo lights are on, but in the darkened room, they create the perfect subtle look I was hoping for. (sorry it's so blurry).


At this point I still have not installed the trim work and I also have to created the beam/curtain holder that will divide the room, but it is slowly starting to look like something.


Oh, and I intentionally left the doors at the back cracked and put a bulb in the outer "hall" so there is some light spilling in from the back.  It's that whole "illusion of more" thing I love so much about the Thorne Rooms.

This post gets you all caught up with how the room looks now.  Everything from here on out will be shown as I finish it.

Till Later!

Saturday, March 12, 2011

The Mystic Path....Part 2

On Thursday, we took a look at the bare bones of the roombox I'm working on, The Mystic Path. Today we'll take a look at some of the more decorative aspects of this project.

Once the interior walls were in place and the wooden floor installed, it was time to finish the flooring and start adding wallpaper and trim work to the store on the first level.


Now I can't say that I actually "stained" the floors.  what I actually used was a very diluted acrylic paint in a nutmeg color.  After a few applications of the stain (wiping off excess between coats and letting each coat dry between applications) I sealed the floors with a satin sealer.  I think in total I did about three coats of the sealer, sanding between each layer. 

May not be a perfect, pristine floor, but this is an older building after all and the store gets a lot of traffic in and out of it.

After the floor was completed, I painted the ceiling with a sealer coat and then two finish coats of a cream colored acrylic. 

Behind the door to the left, I built a false wall at the back of the box and wallpapered and added trim work so it would appear there is a hallway beyond the door.  There will either be a small table or a set of shelves out there that you can just see through the partially opened door.  This picture shows a test of furniture and was taken before the trim was added.


Rather than glue the wallpaper directly to the walls, I used a thin mat board and glued the wallpaper to it.  Then each wall was put into place.  The bookshelves in the rear were stained and then I added a small wall sconce above each section of the shelving.  The wires for those lights are run through the wall and attached to the tapewire at the back of the box.


Once I had the wiring completed for the sconces and all the wallpaper in place, I painted the crown molding and baseboard trim with acrylic paint.  After the pieces had dried, each was cut to length and attached to the walls.  This not only helps hide the rough edges of the walls, but also gives the room a completed look.

Here is the metaphysical shop, all ready for furniture and accessories.


And if you are wondering what the room looks like with just the lighting on and no outside lights....


Our next installment will show the wallpaper and some of the work that has been done in Madam Aspen's room upstairs. 

Till later!

Thursday, March 10, 2011

The Mystic Path

About nine years ago I had a dream to build a roombox.  This roombox would be two stories tall and tell a story. The lower floor would be a metaphysical shop full of candles, crystals, incense, herbs and other witchcraft items. It's the kind of old store you walk into and are immediately at peace. A sweet aroma of burning incense would be prominent and there would be more to see in that store than you could ever fully absorb in just one visit.  The second floor was to be the lair of the resident fortune teller, Madam Aspen.  When looking at the roombox, it would be obvious that the shop was closed for the night, perhaps the owner is out for the evening celebrating the upcoming Samhain.  The shop lights are dim and you can just make out the merchandise on the shelves.  Upstairs, she has left a couple candles burning and there is an eerie glow coming from her crystal ball.  Perhaps there is a restless spirit longing to make contact and share some important news, but alas....our witch is not there to receive the message.

Other than the dream, I never did anything more about this roombox than to build the box.  Soon after my time to work with minis dwindled to nearly nothing and everything was packed away into a closet, not to be touched for over 8 years. 

Now I'm back and the first project I took up was this roombox....now called "The Mystic Path".  I have gotten a good bit of the basic construction done and soon hope to be moving onto the fun part of actually accessorizing the shop and our fortune tellers room upstairs.  Over the few days or so, I'm going to share with you what I have done and then I'll pick up and start posting projects as they are completed.

First a few pics of the basic box and general layout of the rooms.


The basic box is constructed of plywood (in future boxes I'll use cabinet grade so there aren't knots to deal with) and measures 15.75" wide x 19.75" tall x 12" deep.  Each floor is just over 9" tall.  The small pieces of wood you see attached to the floors and ceiling are there to be a guide for the interior walls.


This is the shop floor with the interior foamcore walls in place and the wood floor installed.  The wood floor was put down one board at a time.  I used a thin wooden craft stick and each board was cut to length as it was glued in place.


The second floor will house the fortune teller's room.  In this picture you see the interior walls installed as well as a double-door in place to check the look.  On the floor is a strip of tapewire that will be used to light the crystal ball.  After this picture was taken, I also installed an additional strip of tapewire on the right wall near the door for a table lamp and there is also a strip on the ceiling to light the lamp above the table where Madam Aspen works her magick.


The final picture tonight shows the wooden floors in place on both levels.  You can see the hole cut in the upper floor. That will be hidden by a carpet. 

I hope you enjoy what you see so far.  There is much more to come.  On our next journey we will look at the finished floor as well as some wallpaper and trimwork. 

Till later!