I'm sorry that there has been a lapse in my postings, but I had a friend in town and not everything can be miniatures. Sometimes real life steps in and in this case, it was a great visit!
I think we left off last time with the completion of the trim work on the shop space on the first floor and I promised to start telling you about the upstairs space, also known as the fortune teller's room.
When I think "fortune teller" my mind immediately goes to a dark room, plush with unusual lighting, creative furnishings and a general feeling of mystery. That is the look and feel I wanted to create on the second floor of my roombox. First thing I did was created an interior wall with a bumped out doorway. I wanted the viewer to feel they could exit the room and explore beyond the doors if they were allowed.
Following the same procedures as the first floor, I created the walls with foam core and then attached the wallpaper to the mat board and attached that to the wooden walls. In this picture, they are still loose and not attached because you shouldn't put up your finished walls until after you have completed your ceiling. Always work from the top down....trust me, i have learned the hard way.

Now it was time to decide what I wanted to do to the ceiling. I thought about papering the ceiling, but felt that it was just too boring for my eccentric lady of the house. I was looking through some pictures and came across a photo of a bedroom with a pleated fabric ceiling. THAT WAS IT! After finding just the right colored Dupioni silk to match the wallpaper, I sat down and created a fabric ceiling for my lady, but I didn't want to do the entire ceiling. Call me silly, but that just seemed to be a bit busy for me. Then I had another thought. What if the room was divided into two separate areas. In the larger area to the left would be the table with the crystal ball. I had already determined that and made allowances in the floor to even light the ball. On the left I decided there needed to be an area where the clients could be greeted by Madam Aspen and led into the "inner sanctum". not only would that allow me to break up the space, but it would also give it a bit more mystery.
Now that it was decided only the left would be for fortunes, that is all I made a pleated ceiling for. This is how that turned out. First picture shows it before installation and the second shows you what it looks like in place.


Oh...you noticed the light huh? Well, of course Madam couldn't have just a simple chandelier or ceiling fixture. I made a lamp and give it an old world (pseudo Moroccan) feel. At least that is what I wanted it to look like. The cylinder in the center is made from an aluminum mesh (the kind used for sculptures) and the top and bottom are buttons I found at a local store. I drilled a whole through the top button to run the light through. The fun part was putting dot of glass paint in each of the tiny little diamonds on the mesh. Pictures really don't do justice to this fixture. One day I will get a good picture showing the variety of color.


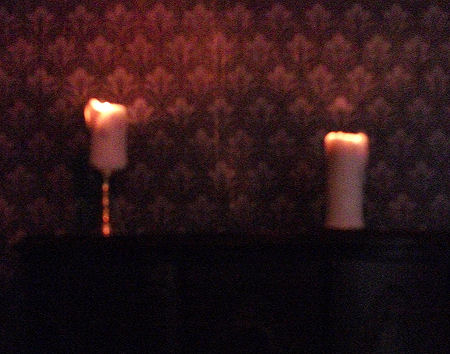
Now you say, you must have installed the crown molding and the baseboard. Well, normally I would have, but I wanted some more custom lighting in the room. I just could not find any lights or electrified candles that I liked so I would have to make them. Before I could attach the wallpaper I would have to finish my lighting and get it all installed.
Next on my list of light projects was a table lamp with a cutout shade and some fun fringe. It just screamed eccentric to me and I'm LOVING it.

At this point I still have not installed the trim work and I also have to created the beam/curtain holder that will divide the room, but it is slowly starting to look like something.

Oh, and I intentionally left the doors at the back cracked and put a bulb in the outer "hall" so there is some light spilling in from the back. It's that whole "illusion of more" thing I love so much about the Thorne Rooms.
This post gets you all caught up with how the room looks now. Everything from here on out will be shown as I finish it.
Till Later!

Wow! Madam's room is beautiful. I love the wall paper and the ceiling is awesomeness! Your lamps are brilliant, i always admire people who make their own. Your talent is enormous. I can't wait to see more. Thank you for the mention Dale :) I think your blog will be very popular.
ReplyDeleteVictoria ❤
Im so glad victoria turned me on to your blog, your imagination just blows me away!!! I'm loving those lamps.
ReplyDeleteLove
Marisa
Victoria and Marisa, thank you both so much for the kind words. I can't wait to get more work done on the rooms so I have more to share.
ReplyDeleteI am always so inspired when I see the work of someone new to me and yours is no exception :) I learn so much from looking at what other miniaturists are doing. Since I'm sort of new to this (just over a year now) I'm always glad to have a look at amazing work like yours :) I have so far to go and the work of good artists inspires me to try harder each time I make something. Glad Victoria put you up on her blog, she's such a doll! Hugs-Tara
ReplyDeleteTara, thank you so much for that compliment and I agree about Victoria! If I have learned nothing else by working with miniatures and being associated with other miniaturists, it is this....the amount of sharing and teaching done is absolutely amazing. I remember when I was new to minis and always felt my questions were stupid. Well they weren't and I learned some great things from some true masters. Never be afraid to ask a question. In case you haven't noticed, I love to chat about minis. :-)
ReplyDeleteThanks again for visiting and commenting.
Just catching up with your new blog. The roombox is going to be very interesting with the illusion of places beyond what the eye can see. Just a little peek is all one needs to spark the imagination. Glad to see you are jumping into electrification...it adds another layer of texture. Looking forward to seeing more of this project!
ReplyDeleteTabs
Thanks Tabitha! I agree with you totally. I see an open door or a hallway in a miniature room and I immediately want to get in there and see what else there is to see. The lamps were great fun, if not a bit stressful since they were my first, but I'll never do another unlit miniatures setting.
ReplyDeleteYou are amazing! I'm speechless!
ReplyDeleteBut, I really love the ceiling and the light and the candles... :)
Dale, thank you for such a glowing compliment!
ReplyDeleteCan't wait to post what I just got done working on!